What is AWS EKS ? How To Create Cluster ?

I'm deeply passionate about cloud computing and DevOps, driven by an insatiable curiosity to master cutting-edge technologies. From AWS to Docker, Kubernetes, Jenkins, Linux, Git, and Terraform, I thrive on exploring and pushing the boundaries of what's possible. Beyond the code, I believe in the power of collaboration and shared learning experiences. With each interaction, I cherish the opportunity to grow together and build meaningful connections. As I embark on this exciting journey, I'm eager to contribute my expertise and bring a human touch to the ever-evolving landscape of cloud and DevOps.
What is Amazon EKS?
Amazon Elastic Kubernetes Service (Amazon EKS) is a managed service that you can use to run Kubernetes on AWS without needing to install, operate, and maintain your own Kubernetes control plane or nodes. Kubernetes is an open-source system for automating the deployment, scaling, and management of containerized applications.
How does Amazon EKS work?
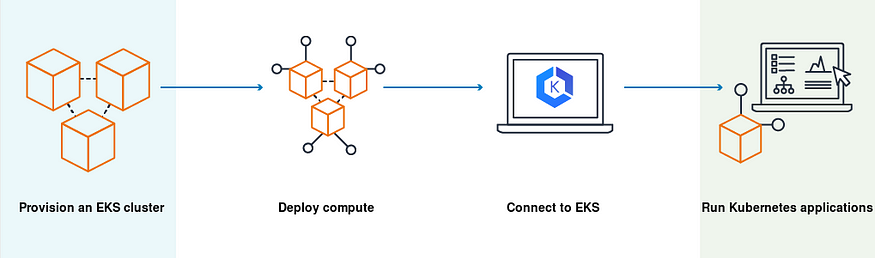
Create an Amazon EKS cluster in the AWS Management Console or with the AWS CLI or one of the AWS SDKs.
Launch managed or self-managed Amazon EC2 nodes, or deploy your workloads to AWS Fargate.
When your cluster is ready, you can configure your favorite Kubernetes tools, such as
kubectl, to communicate with your cluster.Deploy and manage workloads on your Amazon EKS cluster the same way that you would with any other Kubernetes environment. You can also view information about your workloads using the AWS Management Console.
Source: https://docs.aws.amazon.com/
Agenda:
Setup an EC2 Instance to create a cluster
Setup kubectl
Setup eksctl
Create an IAM Role and attach it to the EC2 instance
Create your cluster and nodes
Create a Pod using Kubectl to Validate the Cluster
Deploying Nginx Container
Delete the EKS cluster
Step 1: Setup Bootstrap Image to create Cluster
In this step, we will first set up a Bootstrap Image using AWS EC2 Instance.
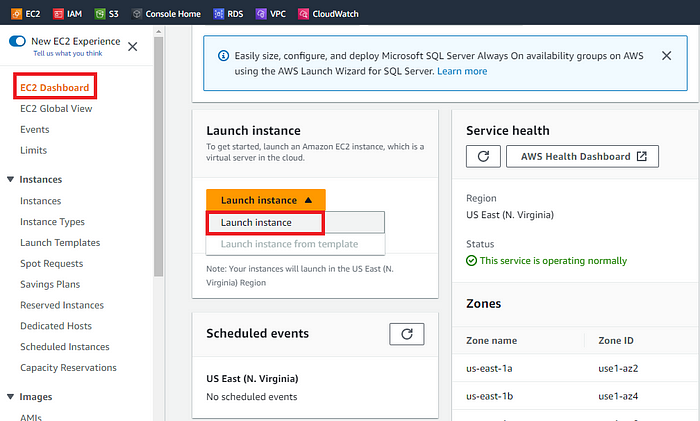
Log in to the Amazon management console, open EC2 Dashboard, click on the Launch Instance drop-down list, and click on Launch Instance as shown below:
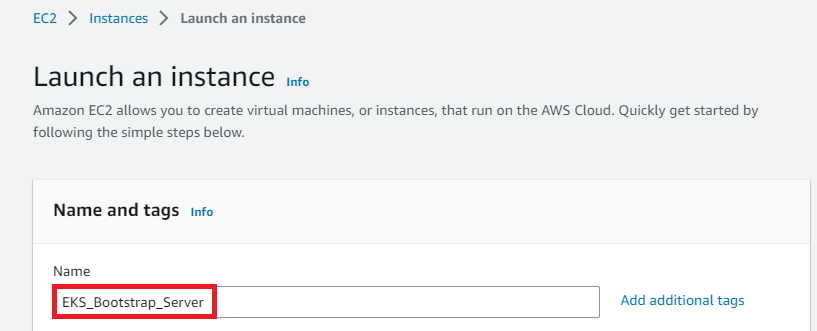
Once the Launch an instance window opens, provide the name of your EC2 Instance:
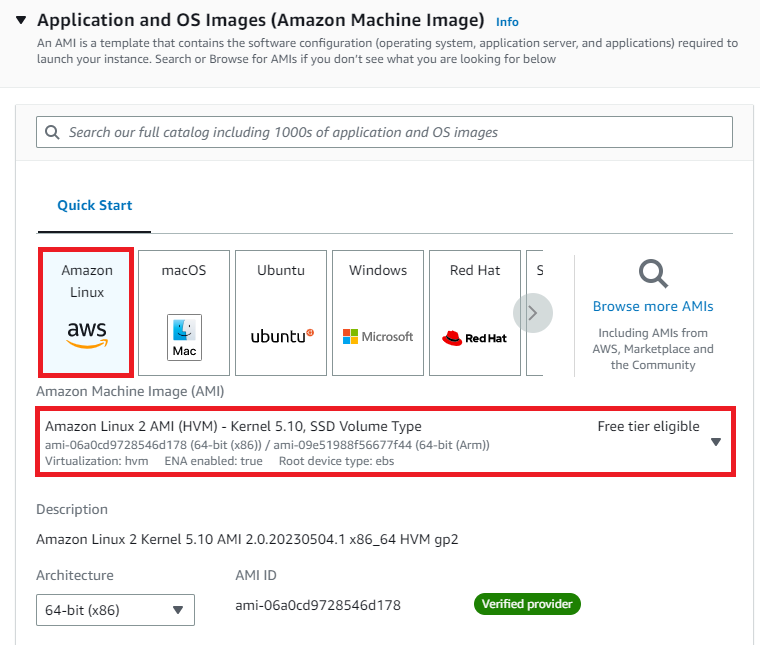
For this demo, we will select Amazon Linux 2 AMI which is free tier eligible.
Choose an Instance Type. Here you can select the type of machine, number of vCPUs, and memory that you want to have. Select t2.micro which is free-tier eligible.
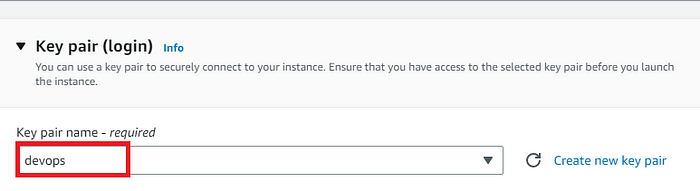
For this demo, we will select an already existing key pair. You can create new key pair if you don’t have:
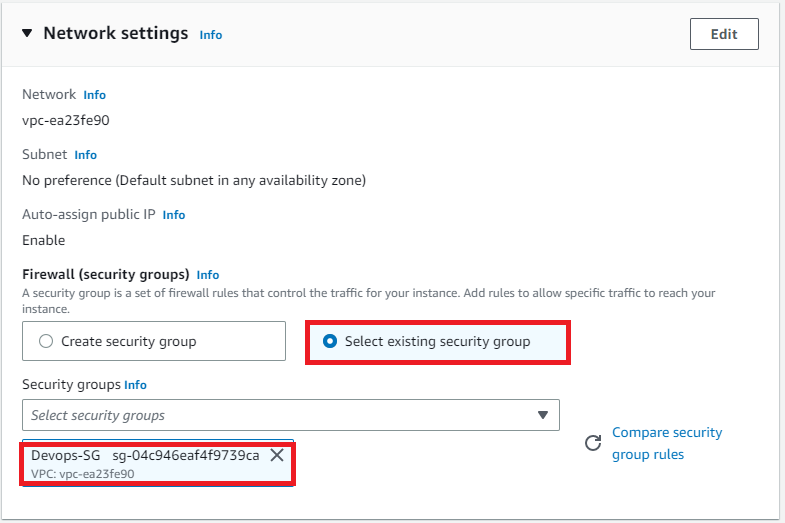
Now under Network Settings, Choose the default VPC with Auto-assign public IP in enable mode. We will select an existing security group that we have been using in our DevOps projects.
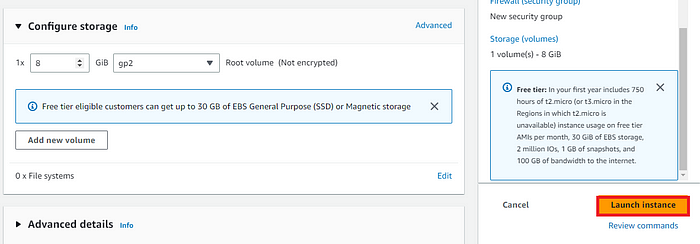
Rest of the settings we will keep them at default and go ahead and click on Launch Instance
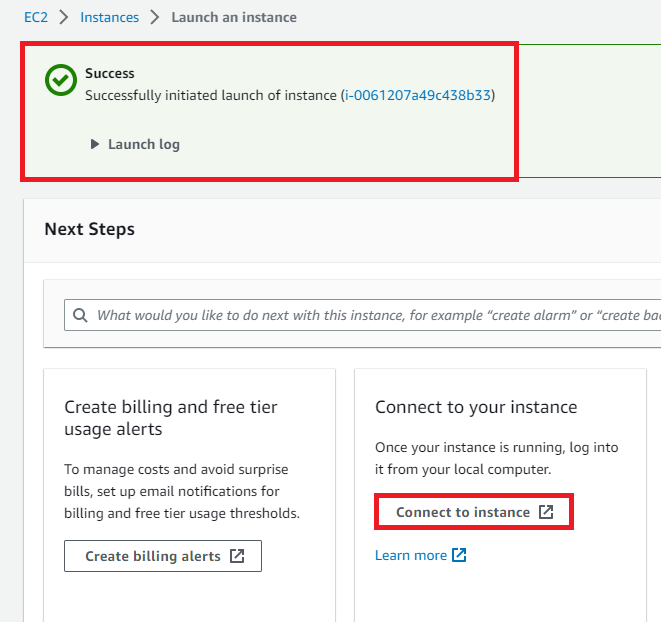
On the next screen you can see a success message after the successful creation of the EC2 instance, click on Connect to instance button:
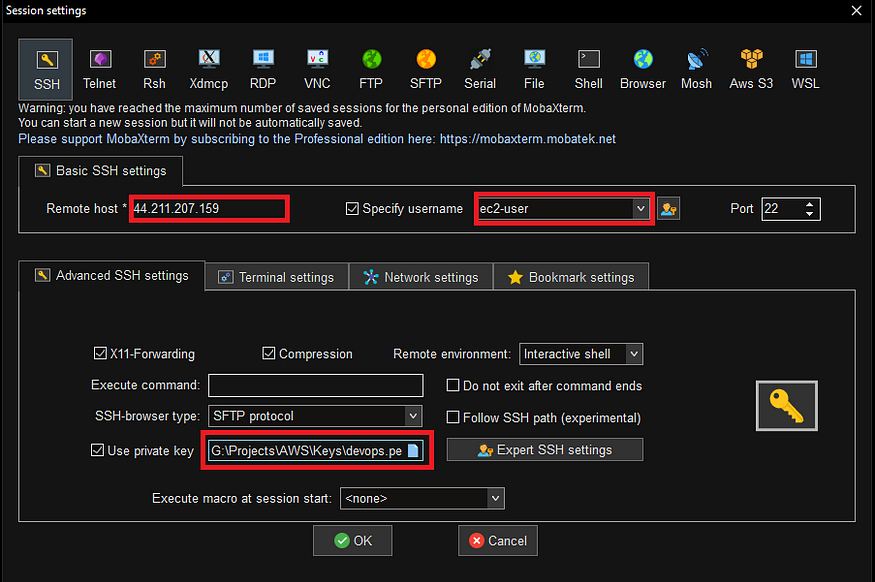
Open any SSH Client in your local machine, take the public IP of your EC2 Instance, and add the pem key and you will be able to access your EC2 machine in my case I am using MobaXterm on Windows:
Once we are logged into our EC2 machine we will check the version AWS CLI:
[root@ip-172-31-92-254 ~]# aws --version
aws-cli/1.18.147 Python/2.7.18 Linux/5.10.178-162.673.amzn2.x86_64 botocore/1.18.6
As per AWS Documentation AWS CLI version should be 2.11.3 or Later.
AWS CLI — A command line tool for working with AWS services, including Amazon EKS. This guide requires that you use the version
2.11.3or later or1.27.93or later
Let’s first update the AWS CLI on our EC2 machine. The command for that is given below:
curl "https://awscli.amazonaws.com/awscli-exe-linux-x86_64.zip" -o "awscliv2.zip"
unzip awscliv2.zip
sudo ./aws/install
After installation, let’s check the AWS CLI version again and it should look something like this:
[root@ip-172-31-92-254 ~]# aws --version
aws-cli/2.11.21 Python/3.11.3 Linux/5.10.178-162.673.amzn2.x86_64 exe/x86_64.amzn.2 prompt/off
Step 2: Setup kubectl
a. Download kubectl version 1.26
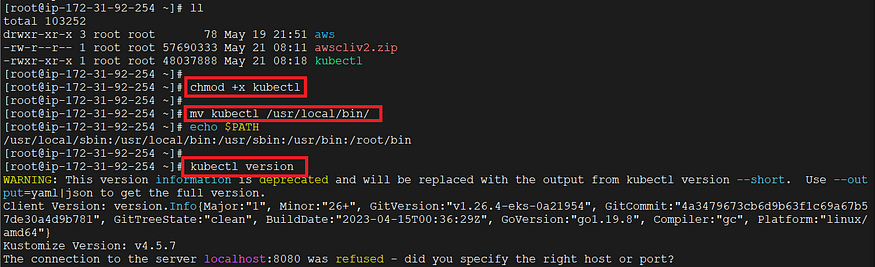
b. Grant execution permissions to kubectl executable
c. Move kubectl onto /usr/local/bin
d. Test that your kubectl installation was successful
Let’s first Download the kubectl with the below command:
curl -O https://s3.us-west-2.amazonaws.com/amazon-eks/1.26.4/2023-05-11/bin/linux/amd64/kubectl

After it is downloaded let’s grant execution permissions to it and move kubectl to /usr/local/bin directory and also test the kubectl installation.
Step 3: Setup eksctl
a. Download and extract the latest release
b. Move the extracted binary to /usr/local/bin
c. Test that your eksclt installation was successful
Let’s first download eksctl and move to /usr/local/bin directory and check its version with the below commands:
curl --silent --location "https://github.com/weaveworks/eksctl/releases/latest/download/eksctl_$(uname -s)_amd64.tar.gz" | tar xz -C /tmp
sudo mv /tmp/eksctl /usr/local/bin
eksctl version
Output:

Step 4: Create an IAM Role and attach it to the EC2 instance
IAM user should have access to IAM, EC2, and CloudFormation
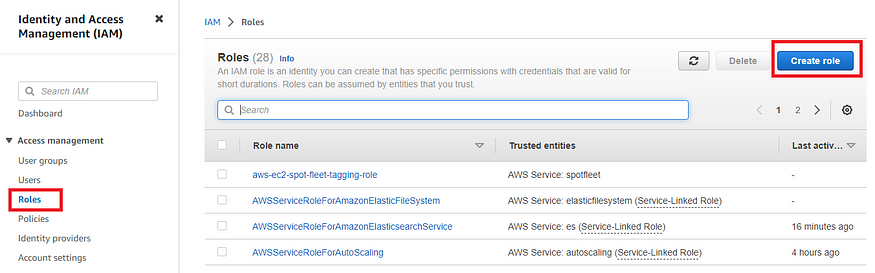
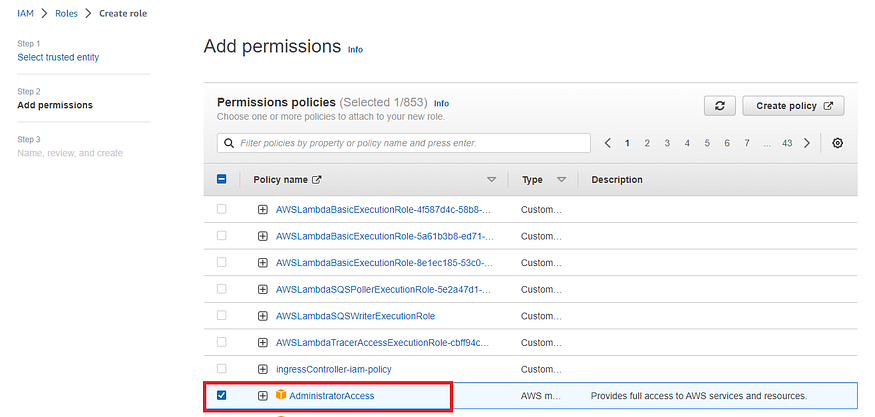
Go to your AWS console and search for IAM. Under Access management, Select Roles and then click on Create role:
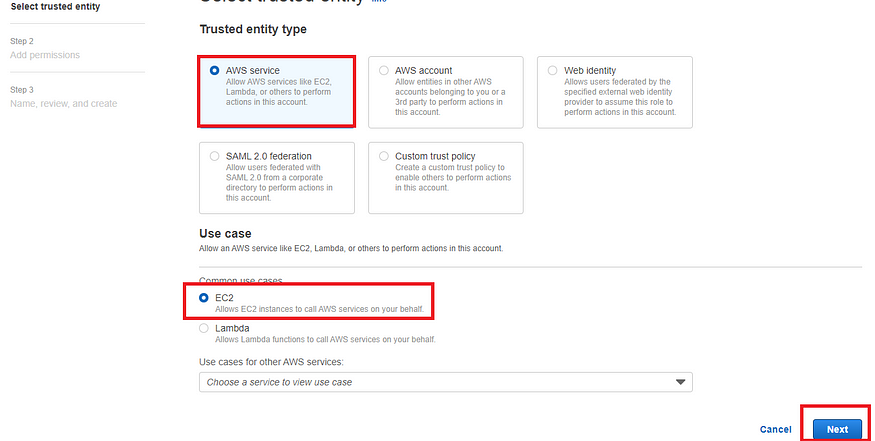
On the next screen, we will select the EC2 service and click on Next:
As mentioned earlier we need to provide the IAM user access to EC2, Cloudformation, and IAM, however, for the sake of this demo, we will provide full Administrative Access to the User(which is recommended in real-world scenarios):
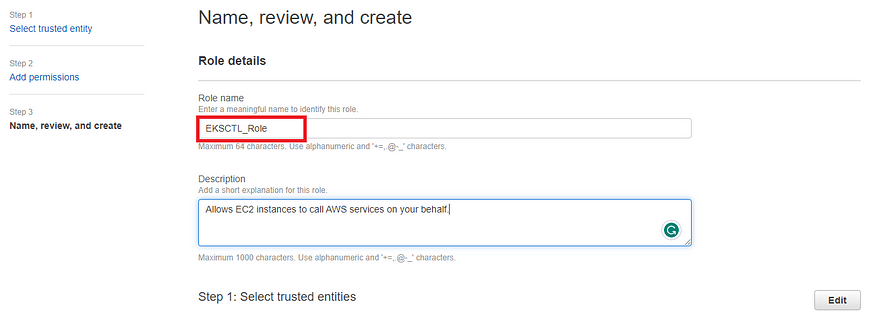
On the next page, provide the name of your role and finally click on Create Role to proceed:
After creating the role we need to add this role to our Bootstrap EC2 Instance:
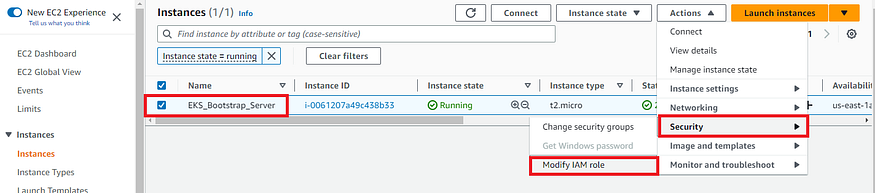
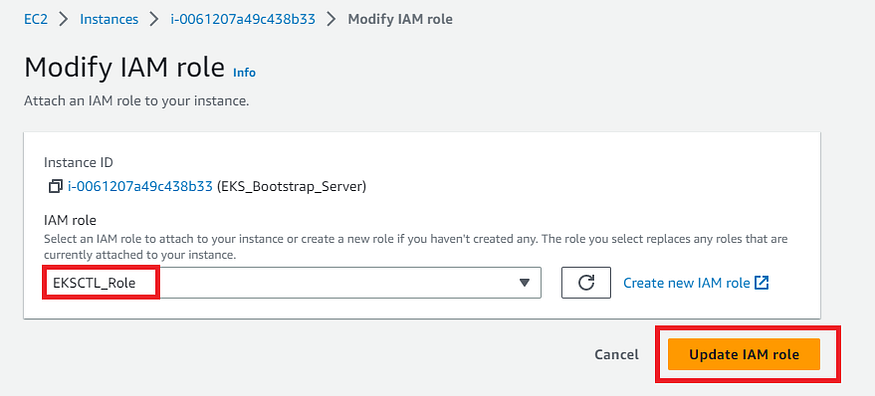
Select the role and click on Update IAM role as shown below:
Step 5: Create your cluster and nodes
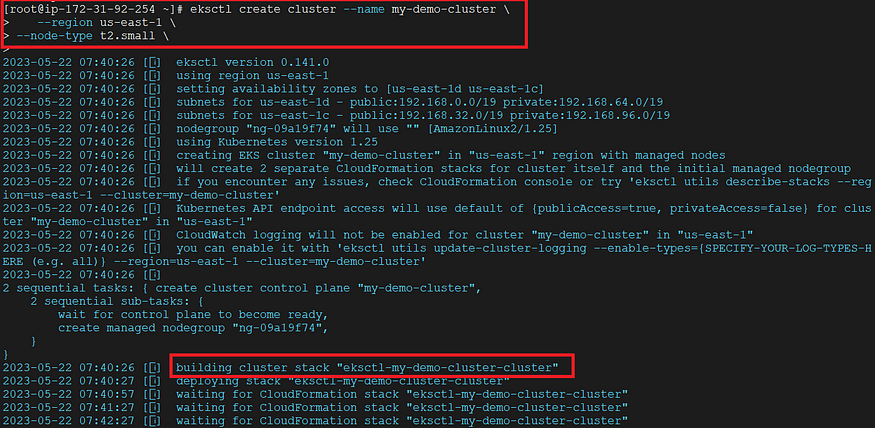
To set up our first Kubernetes cluster we will use the below command in which we have to provide the name of our cluster, the region in which it will be created, and the size of our Instance.
eksctl create cluster --name my-demo-cluster \
   --region us-east-1 \
--node-type t2.small \
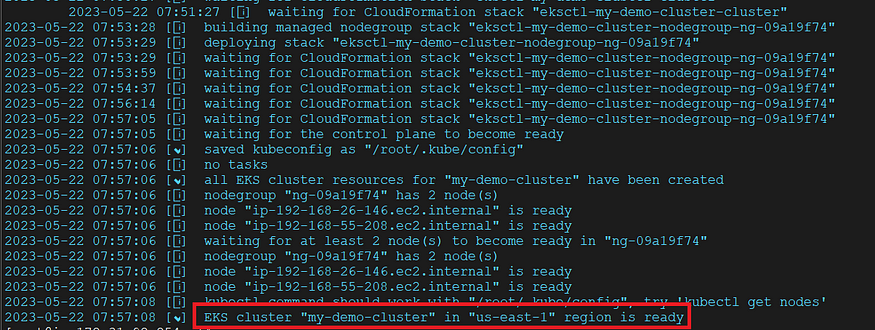
The execution of this command will take at least 20 minutes and as you might know, eksctl utilizes Cloudformation at the backend to create the cluster so we should see a new template in Cloudformation.

Output:
If we check our EC2 dashboard we should see two new nodes as part of our cluster:

Also from the CLI, we can verify the creation of two nodes using the “kubectl get nodes” command:

To display what all resources we have in our Kubernetes cluster we can issue the command “ kubectl get all” :

Step 6: Create a Pod using Kubectl to Validate the Cluster
Let’s create a Pod using the kubectl command “kubectl run webapp — image=httpd”, where webapp is the name of our first pod and httpd is the image name.

Step 7: Deploying Nginx Container
Let's now create a deployment that will help us to create pods. The command for that would be:
kubectl create deployment demo-nginx --image=nginx --replicas=2 --port=80
The above command uses kubectl to create the deployment with the name demo-nginx and pulls image nginx from the DockerHub.Also, it creates two replicas for high availability and exposes port 8080.
[root@ip-172-31-92-254 ~]# kubectl create deployment  demo-nginx --image=nginx --replicas=2 --port=80
deployment.apps/demo-nginx created
The above output also verifies the successful creation of our deployment by using the command “kubectl get deployments”.
We can also verify the creation of two replicaset in the background:
[root@ip-172-31-92-254 ~]# kubectl get replicaset
NAME                    DESIRED   CURRENT   READY   AGE
demo-nginx-699bd94686   2         2         2       3m7s
Also, we can check our newly created two pods :

Let’s now expose this application to the external network by using the command:
kubectl expose deployment demo-nginx --port=80 --type=LoadBalancer
[root@ip-172-31-92-254 ~]# kubectl expose deployment demo-nginx --port=80 --type=LoadBalancer
service/demo-nginx exposed
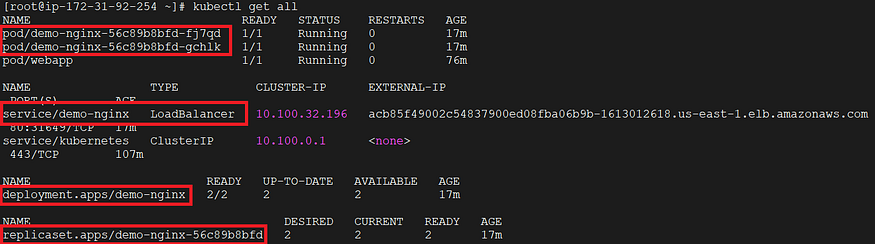
Finally, let’s verify all our resources created so far in our cluster:
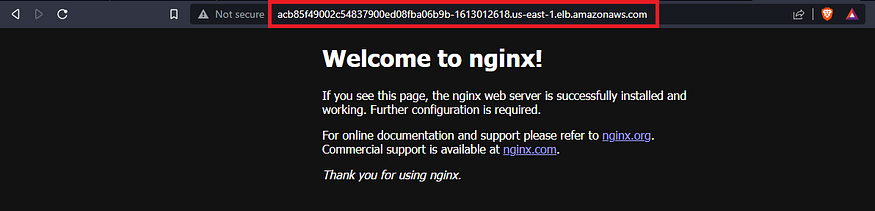
We can verify the Nginx default page from our browser also:
Step 8: Delete the EKS cluster
When you’re done using an Amazon EKS cluster, you should delete the resources associated with it so that you don’t incur any unnecessary costs.
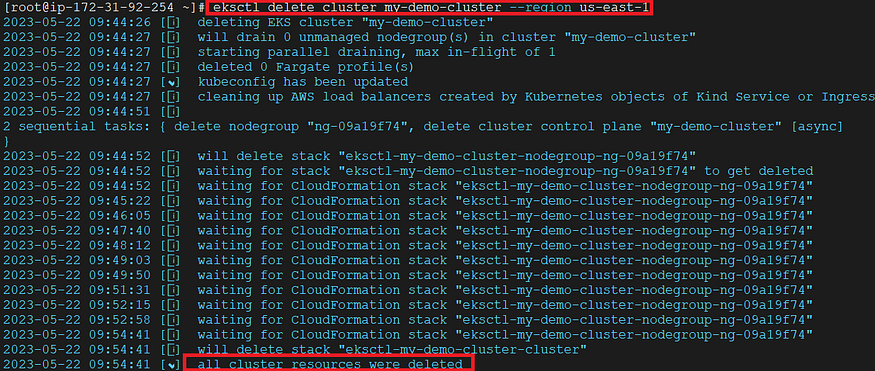
Delete the cluster and its associated nodes with the following command,
eksctl delete cluster my-demo-cluster --region us-east-1
Output:
Conclusion
In this blog, we learned how to set up a Kubernetes cluster on an EC2 machine using kubectl and eksctl. We also learned how to delete all the resources in the cluster in one go.


